Why Rubber Roofing is the Superior Choice for Your Home’s Flat Roof
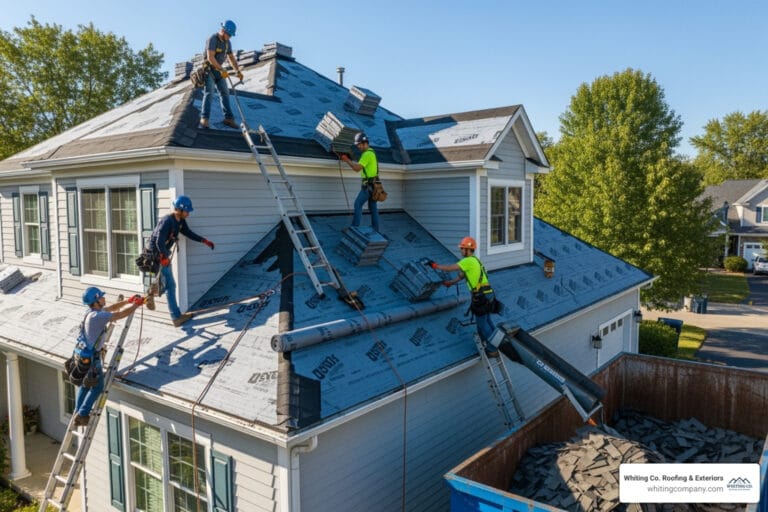
A residential rubber roof installation involves applying a single-ply membrane—typically EPDM, TPO, or PVC—to create a seamless, waterproof barrier on flat or low-slope roofs. Unlike traditional materials that fail in these applications, rubber roofing provides a durable, long-lasting solution perfect for Maryland homes. For any homeowner considering their options, understanding this system is the first step in a successful residential roofing project.
Key System Attributes:
- Expected Lifespan: 30 to 50 years with proper installation.
- Average Cost: $4.25 to $14 per square foot.
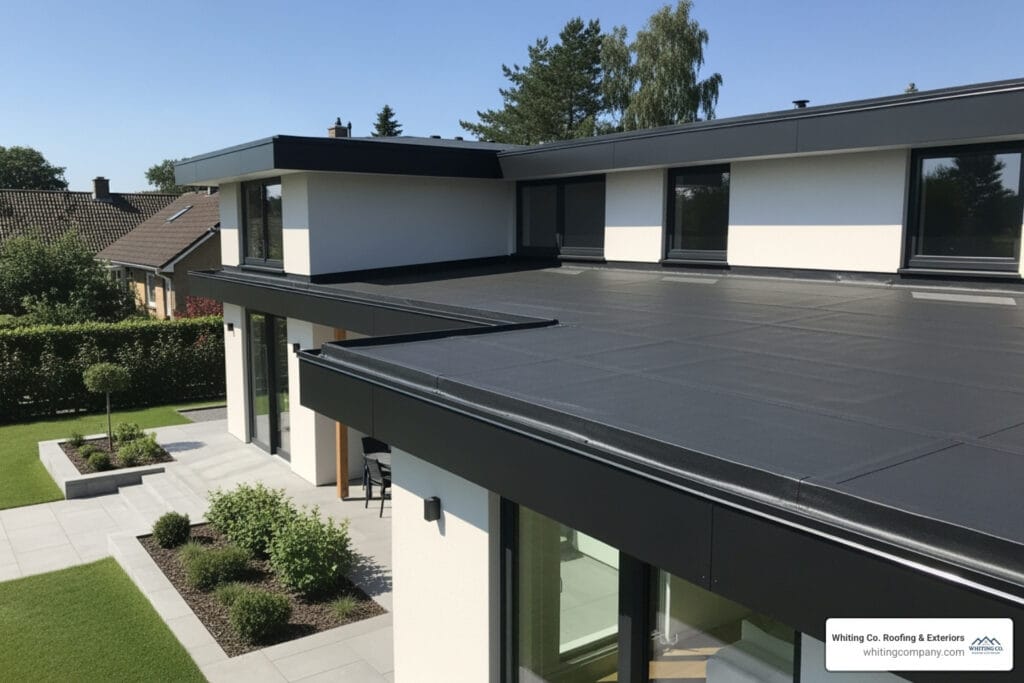
- Primary Benefit: Creates a seamless, watertight barrier ideal for flat roofs.
Rubber roofing has revolutionized how we protect flat and low-slope residential structures. Where traditional asphalt roll roofing often leads to leaks and frequent repairs, modern single-ply membranes offer best performance.
The main advantages of a rubber roof include:
- Durability: A properly installed rubber roof can last up to 50 years, far outperforming other materials. It resists UV damage, extreme weather, and temperature swings, making it ideal for Maryland’s climate.
- Low Maintenance: Rubber membranes require only periodic inspections to clear debris. They don’t crack, curl, or lose granules like shingles, meaning fewer repair calls and greater peace of mind.
- Cost-Effectiveness: While the upfront cost is higher than asphalt, the exceptional lifespan and minimal maintenance result in a lower total cost of ownership over the life of the roof.
- Eco-Friendly: Many EPDM products are made from recycled materials and are recyclable at the end of their service life.
At Whiting Window Siding and Roofing Roofing & Exteriors, we have spent nearly 50 years perfecting flat and low-slope roofing systems across Maryland. We’ve seen how a professional residential rubber roof installation eliminates the chronic issues of older materials. This guide will walk you through how it’s done right.

Simple residential rubber roof installation glossary:
Planning Your Residential Rubber Roof Installation Project
Before any work begins, a critical planning phase separates a 50-year roof from one that fails prematurely. A properly installed rubber roof starts with meticulous planning, which involves choosing the right material and understanding the investment. Getting these decisions right ensures your home is protected for decades.
Choosing Your Weapon: EPDM vs. TPO vs. PVC Membranes
The term “rubber roofing” typically refers to three main types of single-ply membranes. Each has unique properties suited for different needs and budgets.
- EPDM (Ethylene Propylene Diene Monomer): The most common and time-tested option, EPDM is a true thermoset rubber with a track record dating back to the 1960s. It is extremely durable, flexible in cold weather, and often comes in large sheets that can cover most residential roofs without seams. As the most economical choice, it’s the go-to for many homeowners.
- TPO (Thermoplastic Olefin): A newer, thermoplastic material known for its energy efficiency. TPO, while technically a thermoplastic, is often grouped with rubber roofing for its similar use on flat roofs. Its standard white color reflects solar radiation, reducing cooling costs in hot climates like Maryland’s summers. TPO seams are heat-welded, creating a bond that is stronger than the membrane itself.
- PVC (Polyvinyl Chloride): The premium thermoplastic option, PVC offers exceptional strength and resistance to chemicals, fire, and punctures. Like TPO, its seams are heat-welded for maximum durability. PVC is particularly effective at withstanding ponding water, making it ideal for roofs with poor drainage, though it is the most expensive of the three.
The right choice depends on your priorities: budget, energy efficiency, or maximum durability. Our team at Whiting Window Siding and Roofing can help you select the perfect roofing materials for your specific situation.
| Feature | EPDM (Ethylene Propylene Diene Monomer) | TPO (Thermoplastic Olefin) | PVC (Polyvinyl Chloride) |
|---|---|---|---|
| Material Type | Thermoset rubber | Thermoplastic | Thermoplastic |
| Pros | – Most common and economical – Excellent UV resistance – Highly flexible in cold – Easy to repair | – Excellent energy efficiency (white options) – Strong, heat-welded seams – Good puncture/tear resistance | – Extremely durable & flexible – Highly resistant to chemicals/grease – Strongest seams (heat-welded) |
| Cons | – Typically black (absorbs heat) – Seams are adhesive-based – Less tear resistant | – Can be more expensive than EPDM – Vulnerable to chemical damage – Prone to shrinking if not properly installed | – Highest cost – Environmental concerns (dioxins/chlorine) – Can be brittle in extreme cold |
| Avg. Cost/sq.ft. | $4.25 – $12 | $4.50 – $14 | $5.25 – $13 |
| Lifespan | 25-30 years (up to 50+ with maintenance) | 15-30 years (up to 30+ with maintenance) | 20-30 years (up to 30+ with maintenance) |
Budgeting for Durability: Understanding Installation Costs
A new rubber roof for a typical home costs between $7,000 and $23,000, or $4.25 to $14 per square foot. While a significant investment, its 30- to 50-year lifespan makes it one of the most economical long-term roofing decisions.
Key factors influencing the final price include:
- Roof Size & Complexity: Larger roofs and those with many penetrations (chimneys, skylights, vents) require more material and skilled labor.
- Material Choice: EPDM is the most budget-friendly, followed by TPO, with PVC at the premium end.
- Labor Costs: Accounting for about 60% of the total, labor covers expert deck preparation, membrane adhesion, and intricate flashing work. This specialized skill is what ensures a leak-free, 50-year lifespan.
- Removal of Old Roofing: Tearing off the existing roof adds $1 to $5 per square foot.
Though the initial cost exceeds asphalt shingles, a rubber roof’s longevity and low maintenance often make it the more cost-effective choice over time. We provide transparent flat roof prices so you understand exactly where your investment goes.
Is a Rubber Roof Right for Your Home? Key Considerations
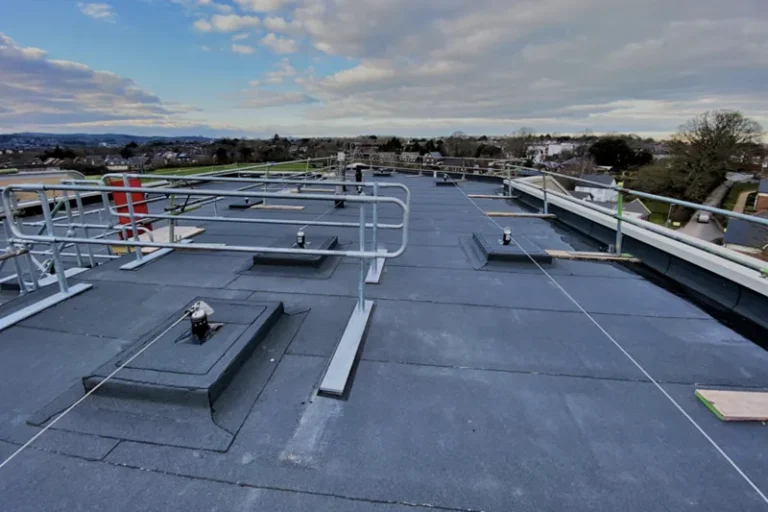
A rubber membrane is the best—and often only—viable option for flat or low-slope roofs. Traditional shingles are designed for sloped roofs and will fail quickly in flat applications where water can pool.
Consider a rubber roof if:
- Your roof has a low slope: It is essential for any roof with a pitch less than 2:12 (2 inches of rise for every 12 inches of run).
- You live in a variable climate: Rubber membranes excel in Maryland’s weather, staying flexible in the cold and resisting UV damage in the summer heat.
- You want a low-maintenance solution: Semi-annual inspections and debris removal are typically all that’s needed.
The single most critical factor for a successful residential rubber roof installation is contractor expertise. The material only performs as promised when installed flawlessly. Improperly sealed seams, poor flashing, and inadequate adhesion will lead to failure. Hiring a contractor with proven expertise in single-ply systems is paramount. We always recommend a professional roof inspection to assess your roof and confirm a rubber membrane is the right solution.
The Ultimate 8-Step Guide to Installing a Rubber Roof
While professional installation is strongly recommended, understanding the process helps homeowners ensure the job is done right. A flawless installation is the key to a 50-year, leak-free roof. This is how a professional residential rubber roof installation is performed.

Step 1: Roof Deck Preparation
A long-lasting rubber roof begins with a perfectly prepared substrate. First, the existing roof is stripped completely down to the wood sheathing—installing a membrane over old shingles will cause punctures and void the warranty. The exposed deck is then inspected for rot or damage, with any compromised sections replaced. A slight slope (at least ¼ inch per foot) is confirmed or created to ensure proper drainage. Finally, the surface is cleaned carefully to be dry and free of all debris and fasteners. For more on this stage, see our Roof Decking Replacement Guide 2025.
Step 2: Installing Insulation & Underlayment
Next, a layer of polyisocyanurate (iso board) insulation is installed over the deck. This board serves two key functions: it creates a smooth, stable substrate essential for proper membrane adhesion, and it adds R-value to improve the home’s energy efficiency. The insulation boards are secured with specialized fasteners and plates according to manufacturer specifications to withstand wind uplift.
Step 3: Laying and Relaxing the Membrane
The large EPDM, TPO, or PVC sheet is unrolled and positioned over the roof, with adequate overhang on all sides. The membrane is then left to “relax” for at least 30-60 minutes. This crucial step allows packing wrinkles and creases to flatten out, ensuring a smooth, uniform surface before adhesion begins. Rushing this step can lead to permanent wrinkles that compromise long-term performance.
Step 4: Adhering the Membrane
For residential projects, a fully adhered system is the gold standard. This method bonds the entire membrane to the substrate for maximum wind resistance. The process involves folding one half of the membrane back, applying a consistent coat of bonding adhesive to the exposed insulation board with a roller, and then carefully rolling the membrane back into the adhesive. A stiff broom is used to sweep from the center outwards, eliminating all air bubbles and ensuring 100% contact. The process is then repeated for the other half.
Step 5: Seaming and Detailing
If the roof requires multiple sheets, creating waterproof seams is vital. Modern systems use a seam tape primer to clean and prepare the overlapping membrane surfaces. A double-sided seam tape is then applied, and the top sheet is pressed firmly onto it. A silicone hand roller is used to apply firm pressure along the entire seam, creating a bond that is stronger than the membrane itself. For TPO and PVC systems, a heat-welder is used to fuse the seams at a molecular level.
Step 6: Flashing Penetrations and Edges
Any interruption in the roof plane—vents, chimneys, skylights—is a potential leak point and must be flashed perfectly. This is a critical part of any Roof Installation.

Pre-made rubber pipe boots are used for standard pipes, while uncured flashing tape is molded to fit irregular shapes like chimneys. This pliable material is adhered to both the roof membrane and the vertical surface of the penetration, creating a continuous waterproof barrier. All edges are sealed with lap sealant to ensure no water can get in.
Step 7: Installing Edge Trims
To finish the installation, metal or PVC edge trims are installed around the roof’s perimeter. These trims serve a dual purpose: they mechanically clamp the membrane to prevent wind uplift and give the roof a clean, professional look. They also direct rainwater into the gutters, protecting fascia boards from water damage and staining.
Step 8: Final Inspection
The residential rubber roof installation is not complete without a thorough final inspection. Every seam, flashing, and edge is examined to ensure perfect adhesion and sealing. The entire surface is checked for any damage or air bubbles, and any minor issues are addressed immediately. Finally, the roof is cleaned of all debris and residue, leaving behind a pristine roof ready for decades of service.
After the Install: Maintenance, Comparisons, and DIY vs. Pro
Your new rubber roof is installed, but its long-term performance depends on proper care and understanding its advantages over other systems.
Maintaining Your Investment: Rubber Roof Care for 50+ Year Longevity
A major benefit of a residential rubber roof installation is its low-maintenance nature. However, a little proactive care will ensure it reaches its full 30- to 50-year lifespan. We recommend a visual inspection twice a year (spring and fall) and after major storms.
During your inspection, look for:
- Debris: Clear away leaves, branches, and other debris to ensure proper drainage.
- Seams and Flashing: Check all seams and details around pipes and chimneys for any signs of lifting or separation.
- Punctures or Tears: Look for damage from fallen branches or hail.
- Growth: Gently clean any significant algae or moss growth that could impede drainage.
If you spot any issues, avoid DIY fixes with roofing cement. A professional Roof Repair is a simple, permanent solution that will maintain the integrity of your roofing system.
Rubber vs. Traditional Roofing: A Head-to-Head Comparison
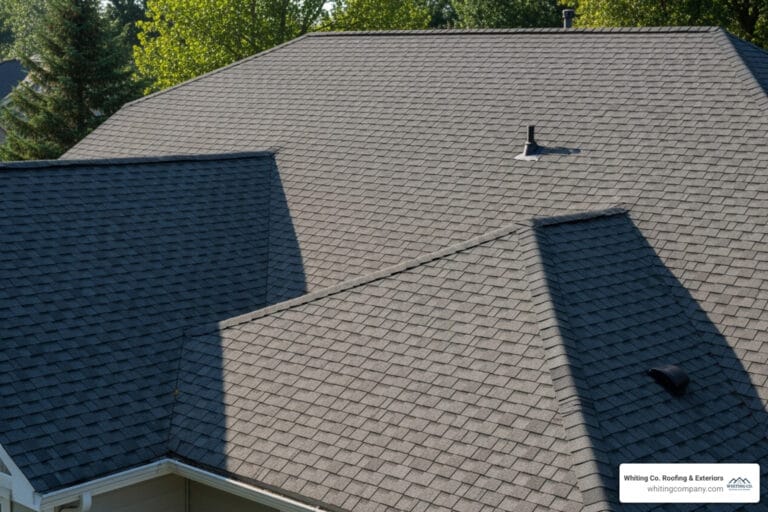
When compared to asphalt shingles on a low-slope roof, rubber roofing is the clear winner in almost every category.
- Lifespan & Lifetime Cost: Asphalt shingles may last 15-25 years and have a lower upfront cost, but a rubber roof lasts 30-50 years. Over the life of your home, you may replace shingles two or three times for every one rubber roof, making rubber the more economical long-term choice.
- Durability & Waterproofing: Shingles rely on gravity and are not designed for low-slope applications where water can sit. This leads to rapid deterioration and leaks. A rubber membrane creates a single, seamless waterproof barrier engineered to withstand ponding water, UV radiation, and extreme temperatures.
- Maintenance: Shingles on a low-slope roof require constant vigilance. A rubber roof needs only periodic checks, saving time and hassle.
For any flat or low-slope section of your home, rubber roofing provides superior, more Durable Roofing Solutions.

The DIY Dilemma for a residential rubber roof installation: Why Professional Help is Crucial
While DIY videos make it look easy, attempting a residential rubber roof installation is extremely risky and often leads to costly failures. The most common failure points—seams and flashing—require specialized skills, tools, and experience to make them 100% watertight.
A DIY installation is a false economy due to three main risks:
- Guaranteed Leaks: Improperly sealed seams and flashing details will fail, leading to extensive water damage inside your home.
- Voided Warranties: Manufacturers will not honor material warranties on a roof that was not installed by a certified professional.
- Safety Hazards: Working on a roof is inherently dangerous without proper training and safety equipment.
Trusting your Roof Installation to certified experts like Whiting Window Siding and Roofing Roofing & Exteriors ensures the job is done right, backed by a full warranty, and provides peace of mind for decades.
Frequently Asked Questions about Residential Rubber Roof Installation
How long does a residential rubber roof last?
A professionally installed residential rubber roof can last between 30 and 50 years with proper maintenance. Its longevity is one of its primary benefits, far exceeding that of traditional flat roofing materials like asphalt roll roofing (which typically lasts 10-20 years). EPDM, in particular, has a strong track record of lasting several decades. Regular inspections and cleaning of debris are key to ensuring it reaches or exceeds this impressive lifespan.
Can you install a rubber roof over existing shingles?
No, you should never install a rubber roof membrane directly over existing shingles. This is a common misconception and a shortcut that will inevitably lead to failure. The uneven and abrasive surface of the shingles will create pressure points and eventually puncture the new membrane. Furthermore, the trapped moisture between the layers can lead to rot in the underlying deck. For a successful and warrantied residential rubber roof installation, the old roofing material must be completely removed to create a smooth, clean, and stable substrate.
What is the best type of rubber roof for a house?
For most residential applications, EPDM (Ethylene Propylene Diene Monomer) is considered the best and most common choice. It strikes an excellent balance of cost-effectiveness, extreme durability, and ease of repair, backed by a 50-year track record of success. While TPO and PVC are also excellent materials with their own specific advantages (TPO for energy efficiency in hot climates, PVC for superior chemical resistance), EPDM’s overall reliability and value make it the go-to for most homeowners. Its flexibility and resistance to UV and extreme temperatures make it particularly well-suited for the varied climate of Maryland.
Conclusion: Secure Your Home with a Flawless Rubber Roof
A residential rubber roof is an outstanding long-term solution for any home with a flat or low-slope section. Its incredible durability, low maintenance needs, and superior waterproofing capabilities provide the best protection and peace of mind. However, the success of the system hinges entirely on the quality of the installation. For homeowners in Maryland, choosing a local contractor who understands our specific climate challenges is key. Whiting Window Siding and Roofing Roofing & Exteriors brings certified expertise to every project, ensuring your new rubber roof is installed flawlessly for decades of worry-free performance. To get expert guidance and a detailed estimate for your residential roofing project, contact our team today.